Last Updated on August 12, 2025 by admin
In an increasingly digital world, online banking and mobile applications have revolutionized the way consumers manage their finances. Region Online Banking and its accompanying mobile app stand at the forefront of this transformation, offering users a seamless and efficient banking experience.
With a robust suite of features designed to enhance convenience, security, and accessibility, Region Financial Services empowers customers to take control of their financial lives anytime and anywhere
Whether you’re checking your account balance, transferring funds, paying bills, or setting up alerts, Regions Bank’s online platform is designed to meet the varied needs of its customers.
With a user-friendly interface, online banking ensures that accessing your financial information is as easy as possible. The Bank Online Banking empowers customers to take control of their financial futures at their fingertips.
This article will guide you through the registration process for Region Bank Online Banking, highlighting the eligibility requirements, step-by-step instructions.
Read: How to register for TD Bank online banking and mobile app and transfer money
To register for Regions Bank Online Banking, you’ll need to meet a few eligibility requirements and provide specific information during the enrollment process. Here’s a breakdown:
To enroll, you must have one of the following:
- A Regions personal account (e.g., checking, savings, money market)
- A Regions business account
- A Regions loan or credit product (e.g., installment loan, credit card, equity line, IRA, CD, or reloadable card)
Required InformationDepending on your account type, you’ll need:
For Personal Accounts:
- Social Security Number (SSN)
- Personal email address
- Phone number
- ATM/CheckCard number and PIN or Customer Number
For Business Accounts:
- Tax Identification Number (TIN)
- Business Customer Number
- Business account details
If you don’t have a checking or savings account, you can still enroll using your account number for other Regions products like loans or credit cards
Read:How to register for nationwide online banking and mobile app and transfer money
Benefits and features of region bank online banking
Regions Bank Online Banking offers a robust suite of features designed to make managing your finances easier, faster, and more secure. Here’s a comprehensive look at what you get:
Benefits
- Manage your accounts anytime, anywhere—from your computer or mobile device.
- No need to visit a branch for everyday transactions.
- Enhanced protection with two-factor authentication and biometric login options
Features
| Feature | Description |
|---|---|
| Account Management | View balances, transaction history, and account details in real time. |
| Mobile Check Deposit | Deposit checks using your phone’s camera—no need to visit a branch. |
| Online Bill Pay | Schedule and automate payments for utilities, rent, and more. |
| Funds Transfer | Move money between Regions accounts or to external accounts easily. |
| Zelle® Integration | Send and receive money instantly with no fees using Zelle®. |
| Alerts & Notifications | Get real-time updates on account activity, due dates, and spending. |
| Card Controls | Use LockIt® to manage how and where your cards can be used. |
| Budgeting Tools | Track spending, set savings goals, and use calculators to plan finances. |
How to register for Region Online Banking
Enrolling in Regions Bank Online Banking is a straightforward process. Here’s a step-by-step guide to help you get started:
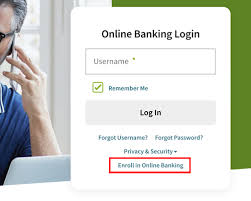
- Visit the Website Go to Regions.com and click Enroll in Online Banking under the login section.
- Enter Customer Information Provide your:
- Social Security Number (SSN)
- Personal email address
- Phone number
- Select Account Type Choose:
- Personal Banking for personal accounts
- Business Banking for business accounts
- Personal & Business if you want to enroll both
- Choose Account Category
- Select Checking or Savings if you have one
- If you only have a loan, credit card, or other product, choose Other Regions Accounts Only
- Verify Your Account You can verify using:
- ATM/CheckCard number and PIN
- Customer Number (usually provided when you opened the account)
- Accept Terms
- Read and accept the Electronic Consent
- Agree to the Terms & Conditions
- Create Login Credentials
- Choose a Username and Password
- Password must include uppercase, lowercase, number, and special character
- Set Security Questions
- Select and answer three security questions
- Confirmation
- You’ll receive a confirmation message
- Click Log In Now to access your account
Region bank mobile app
The Regions Bank Mobile App is a powerful tool that brings your banking experience right to your fingertips. Available for both iOS and Android devices, it’s designed to make everyday banking simple, secure, and convenient.
Features of the Regions Mobile App:
The app offers a wide range of features to help users with their day-to-day banking needs, including:
- Account Management: Check balances, view transaction history for up to 18 months, and manage cards with features like
Regions LockIt®to block certain types of transactions. - Money Movement:
- Mobile Deposit: Deposit checks by taking a picture with your phone’s camera.
- Transfers: Easily transfer funds between your own Regions accounts or to accounts at other financial institutions.
- Zelle®: Send, request, and receive money from people you know and trust.
- Bill Pay: Schedule payments and view payment history.
- Financial Tools:
- Access budgeting and planning tools with
My GreenInsights. - View your FICO® credit score.
- Access budgeting and planning tools with
- Security and Convenience:
- Secure login with biometric ID (fingerprint or face recognition).
- Set up real-time alerts and notifications for account activity.
- Use the app in either English or Spanish.
- Find the nearest Regions branch or ATM with the locator feature.
- Connect with a live banker through the virtual assistant,
Reggie®.
Read: How to register for Halifax online banking and mobile app and transfer money
How to register for Regions Mobile App
To register for the Regions Mobile App, you’ll first need to enroll in Regions Online Banking. Once that’s done, you can download and activate the mobile app. Here’s how to do it step by step:
1. Enroll in Online BankingBefore using the mobile app, you must be enrolled in Regions Online Banking. You can do this by visiting Regions Online Enrollment.
2. Download the Mobile App
- iPhone/iPad: Download from the App StoreAndroid: Download from Google Play
3. Log In to the App
- Open the app and enter your Online Banking Username and Password
- If it’s your first time, you may be prompted to:
- Accept terms and conditions
- Set up biometric login (fingerprint or face ID)
- Choose security questions
4. Customize Your Experience
- Set up alerts and notifications
- Link external accounts if needed
- Activate card controls with LockIt®
- Enable mobile deposit and Zelle® transfers
How to Deposit checks with region mobile app
Depositing checks with the Regions Mobile App is quick and secure. Here’s a step-by-step guide to help you through it:
1. Prepare Your Check
- Endorse the back of the check by signing it.
- Write: “For Regions Mobile RDC Service Only”
- If available, check the box that says: “Check here if mobile deposit”
2. Open the App and Start Your Deposit
- Log in to the Regions Mobile App
- Tap “Make a Deposit” — you can find this:
- As a shortcut above your account list
- Inside your account details under “Deposits”
- Under “Pay & Transfer” in the bottom navigation
3. Choose Deposit Options
- Select the account you want to deposit into.
- Choose how soon you want access to your funds:
- Available Immediately: Fee of 1%–4% of the check amount (minimum $5)
- Available for Processing Tonight: No fee
4. Capture Check Images
- Allow access to your camera and location
- Take a clear photo of the front and back of the check
5. Review and Submit
- Confirm the deposit details
- Tap “Deposit” to submit
6. Store the Check Securely
- Keep the check for 30 days
- After that, mark it VOID or destroy it
- Do not attempt to redeposit the same check
Deposit Limits
| Customer Type | Daily Limit | Monthly Limit |
|---|---|---|
| Standard Customers | $6,000 | $10,000 |
| Preferred Banking Clients | $10,000 | $25,000 |
Read:How to register for Royal Bank Of Scotland online and mobile app and transfer money
How to send money with Zelle®
Sending money with Zelle® through the Regions Mobile App is fast, secure, and free. Here’s how to do it:
1. Log In to the Regions Mobile App
- Open the app and sign in with your Online Banking credentials.
2. Access Zelle®
- Tap “Pay & Transfer” from the bottom menu.
- Select “Send Money with Zelle®”
3. Enroll (if you haven’t already)
- Enter your U.S. mobile number or email address.
- Link your Regions checking account.
- Accept the terms and conditions.
4. Choose a Recipient
- Select someone from your contacts or enter their U.S. mobile number or email.
- Make sure they’re enrolled with Zelle® — if not, they’ll get instructions to enroll.
5. Enter Payment Details
- Type the amount you want to send.
- Add an optional message (e.g., “Thanks for dinner!”)
- Review and confirm the transaction.
6. Send the Money
- Tap “Send” — funds typically arrive within minutes if the recipient is already enrolled.
How to transfer money from region bank
Transferring money from your Regions Bank account is simple and secure, whether you’re moving funds between your own accounts or sending money externally. Here’s a breakdown of your options:
Internal Transfers (Between Your Regions Accounts)You can transfer money:
- Between checking and savings accounts
- To pay your Regions credit card, loan, or line of credit
How to do it:
- Log in to the Regions Mobile App or Online Banking
- Tap “Transfer Money”
- Choose the accounts (From and To)
- Enter the amount and date
- Select One-time or Recurring
- Confirm and submit
No fees for internal transfers Same-day processing if submitted before 8 p.m. CT
External Transfers (To Other Banks)
You can transfer money to or from accounts at other financial institutions.
Steps:
- Log in to your Regions account
- Go to “External Transfers”
- Add your external account (you may need to verify it)
- Choose delivery speed:
- Standard (3–5 business days): No fee
- Next business day: Fee applies
- Enter amount and confirm
You can also set up recurring external transfers

- Register for Bank of Montreal Online banking$ mobile app - January 4, 2026
- Apply for an African Bank Personal Loan & Credit Card - January 1, 2026
- Absa Personal Loans and Credit Facilities: Requirements and Application Process - December 31, 2025